- Get link
- X
- Other Apps
Have you been scouring the
internet searching for a solution to creating a website for free without
incurring any cost?
Owning a website is an excellent way to
reach new audiences via the web and promote your products and services.
However, you might not have the resources to pay for a website.
Luckily, web service providers offer
customers methods of creating and deploying free websites. You can begin
sharing your ideas and products with interested people by learning about some
of the services offering free web creation solutions.
This write-up will entail details
regarding whether owning a free website is an excellent choice. Afterward, I’ll
cover a few free great website builders, and lastly, I’ll guide you
step-by-step on how to create a website free of cost on the best website
platform.
Is Owning a Free
Website Right For You?
Setting a web page can be a tiresome
process requiring time and money. The cost can add up fast from paying for a
domain, web hosting, and third-party add-ons. Luckily, you can design and
launch a website for free.
Free websites are beneficial because
they don’t need you to invest anything but your time and effort. Depending on
the complexity, there are many website builders to choose from, and there are
drag-and-drop page builders you can use to set up your site in a couple of
hours.
It’s worth noting that some website
builders have an upgrade option if you want to take advantage of premium
functionality in the future.
Free website builders have a couple of
caveats. Firstly, most builders will have their branding on your site, which
can lower your brand’s credibility if you sell products or services.
Secondly, most free page builders have
limited features and functionality that require upgrading their membership to
access more robust features. Nonetheless, knowing how to design and deploy a
website free of cost is valuable if you’re on a shoestring budget.
Selecting a Free Page
Builder For Your Website
Wix
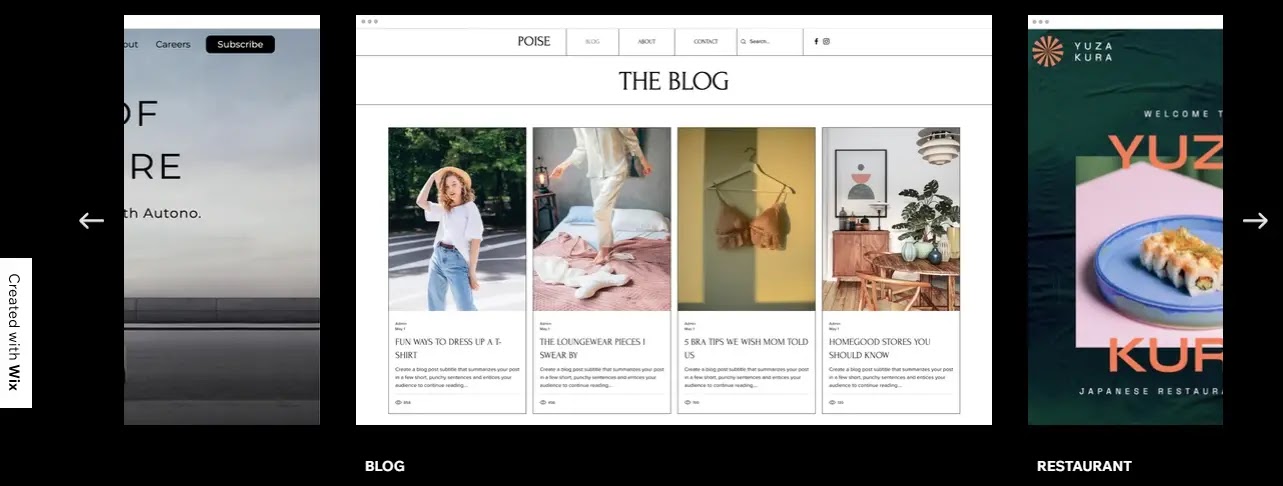
Wix is a famous site builder known for being newbie friendly, as it doesn’t require its users to have any tech or web design expertise.
The platform boasts an intuitive
drag-and-drop editor and more than 500 in-built templates. It’s also possible
to include dynamic features like animations without using code.
Wix has some powerful features that can
be used to improve your page’s search engine optimization (SEO) and tracking
and analytic tools to check your performance and optimize your web page.
The free plan lets users design
unlimited pages, but with the Wix branding. They offer paid plans if you prefer
the flexibility of customizing your site to make it your own.
Systeme.io
Another less popular website builder is systeme.io.
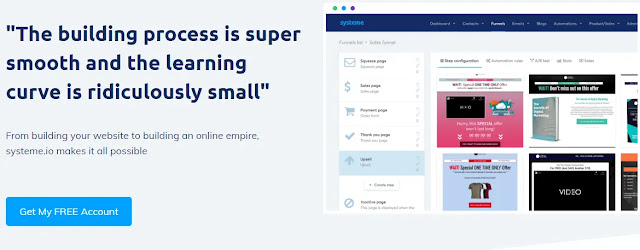
Compared to Wix, systeme.io is more beginner-friendly thanks
to its user-friendly interface and intuitive dashboard. It also boasts more
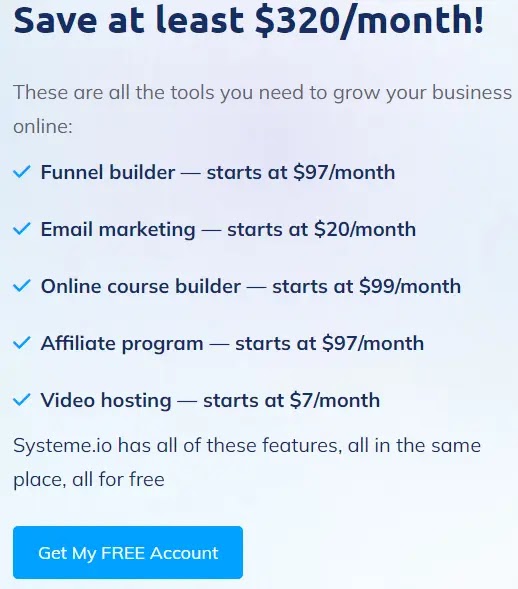
functionalities like:
- Funnel
Builder
- Email
Marketing
- Host
Evergreen Webinars
- Website/Landing
Page/Blog Builder
- Membership
Site
- Host
and Manage Your Affiliate Programs
The best part about systeme.io is you can use all the
abovementioned features for free forever without filling in your credit card
details. They also have paid plans you can upgrade to scale your online
business.
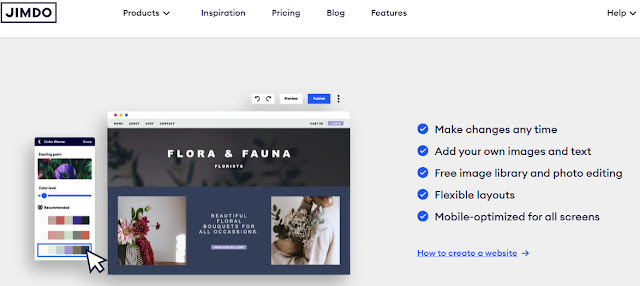
If you’re passionate about artificial intelligence, you can leverage Jimdo since they provide easy solutions for creating professional web pages and eCommerce stores.
Site123 is another alternative, but
because they aren’t as widely used as systeme.io or Wix, you might struggle
with finding helpful tutorials and customer support, which are crucial when
creating a website from scratch.
How to Create a
Website Free of Cost (Simplest Method)
The experience you’ll receive when
building a website depends on the platform choice. The process tends to be
similar for most page builders, but the user interface varies.
To give you a rough idea of what to
expect, I’ll walk you through the process on systeme.io. I’ll show you the
interface and how to start with the website builder.
How to Create a
Website Free of Cost on Systeme.io
Once signed into the platform, you
design your website using the sales funnel or blog feature.
I recommend using the blog feature if
you plan to publish content consistently and have a few pages on your website.
If you intend to create a site with a
few pages, I advise you to leverage the sales funnel feature.
How to Create a
Website Free of Cost Using Systeme.io’s Blog Feature
Requirements:
- A
custom domain previously linked to systeme.io (Learn how here.)
- A
blog created on systeme.io (Get in-depth instructions here.)
When your blog’s created, it will
entail four pages: the about page, the post list page, a contact page,
and the homepage.
The pages can be modified, but you can
add additional pages to the blog.
Step 1: Adding New
Pages to The Blog
Click the “Blogs” tab
marked as number 1 in the screenshot, then input your blog by clicking its
title shown as number 2 in the image.
When creating your blog, it’s crucial
to define its homepage as your site’s homepage (the main URL.)
Doing so ensures your homepage displays
whenever your site opens.
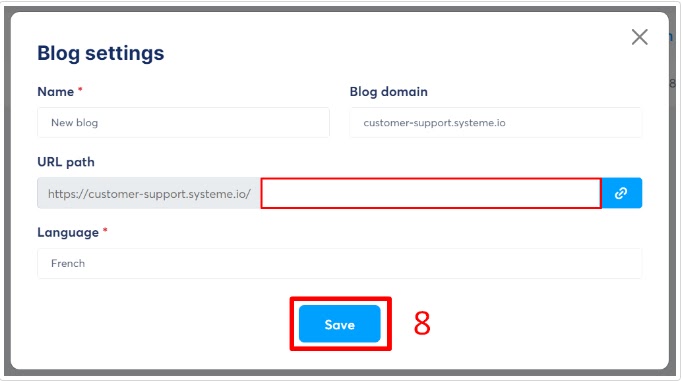
Click the “Blogs” tab
shown as number 6 in the picture, select your blog from the list provided, and
open your “Blog Settings” marked as number 7 in the image
below.
Step3: Add The ‘Menu’ Element To The Homepage
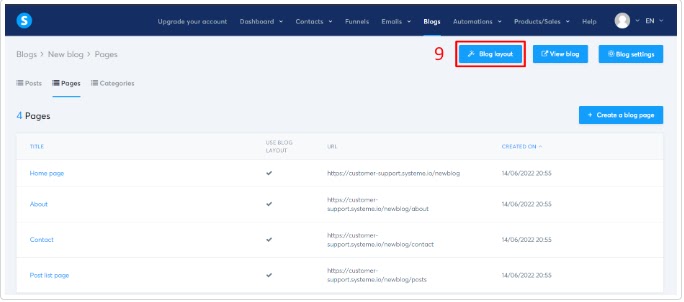
After setting your blog’s homepage, the
next step is adding the “Menu” element. To configure your
blog’s menu, click the “Blog Layout” button shown as number 9.
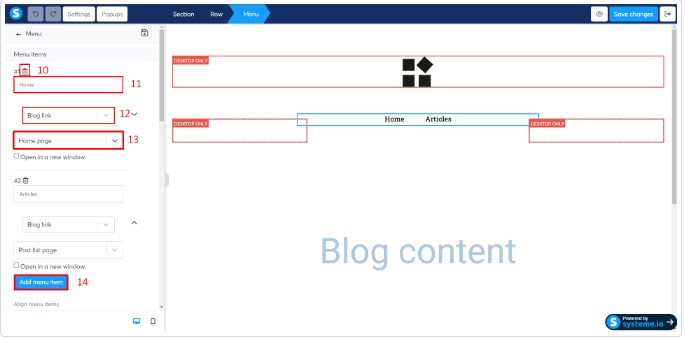
When the editor opens, click the “Menu” element
on the page, allowing you to delete, add, or edit the available menu items.
I recommend adding the same number of
menus that matches the number of pages on your site, as it will help visitors
navigate and access your website from the homepage.
The following options can be customized
in the menu:
- Add new menu item – number 14
- Delete menu item – number 10
- Choose blog link – post or page from the drop-down menu, or insert a custom URL if you have selected the option – number 13
- Choose if you prefer the menu item to be a custom URL or a blog link – number 12
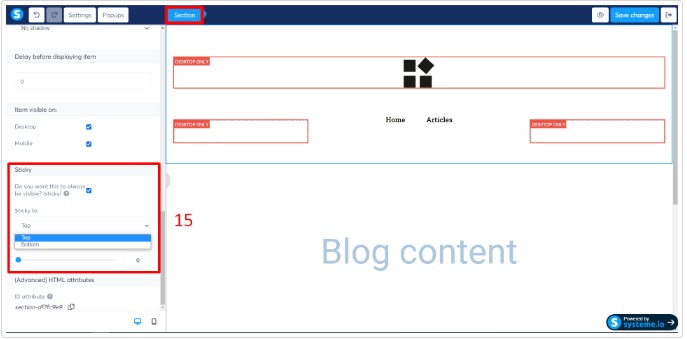
Click the “Menu” element
section and access the “Editor” tab on the left-hand side un till you see
the “Sticky” section.
Check the “Sticky” option
box and select whether you want the section to stick to the bottom or top of
your blog.
To customize your site to suit your
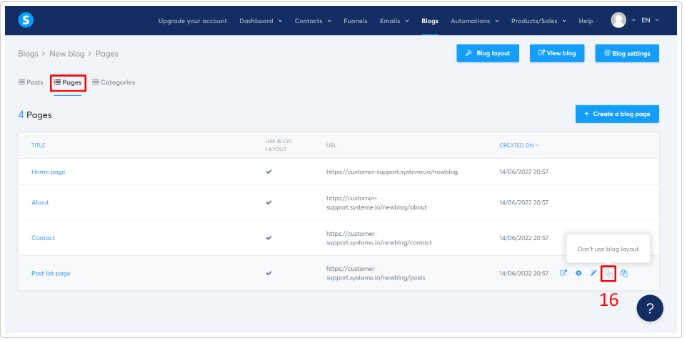
preferences, open the editor of the page you wish to design by clicking “Edit” –
number 17 in the screenshot.
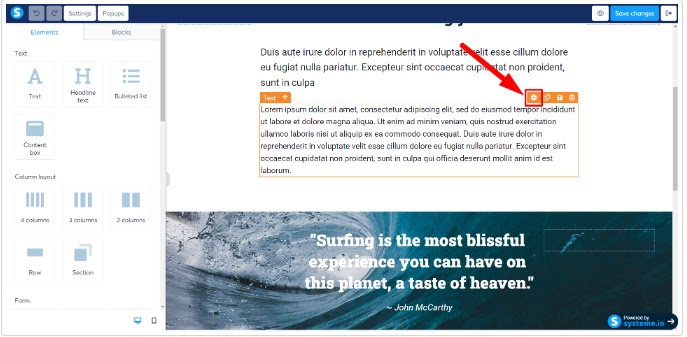
Select the element you want to modify
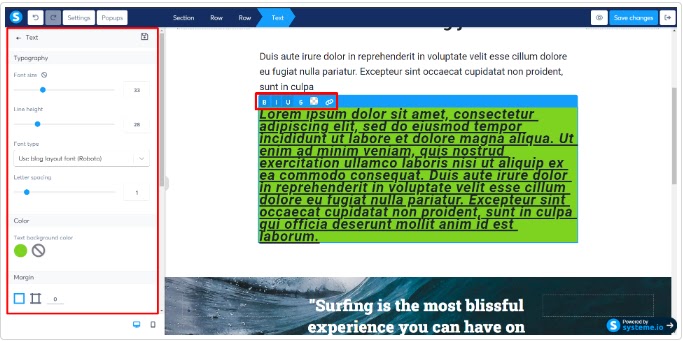
to access its setting and use the editor on the left-hand of your screen. For
instance, I’ll change the “Text” element shown below:
Result:
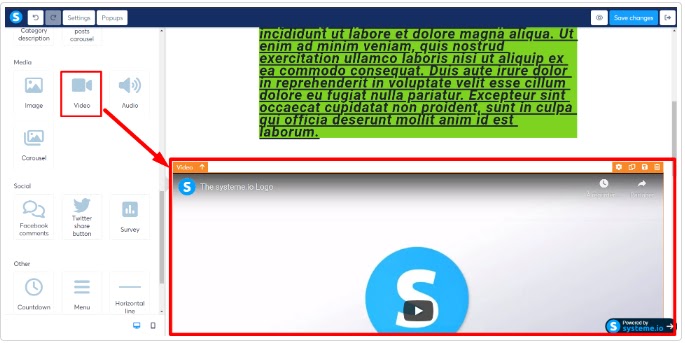
You can add elements like audio, video, or images to your pages besides changing existing aspects.All that’s needed is to drag your
element of choice onto your blog’s page and position it into a relevant
section.
Once a funnel’s created, you need to
add funnel steps. The added funnel steps serve as your site’s pages. It’s
recommended to add five pages/step to your funnel.
Step1. Create a New
Web Page
Open your funnel on systeme.io and click the “Create
Step” button – number 1 in the screenshot.
Step2: Define The
Page on Your Funnel That You Wish to Set as The Homepage
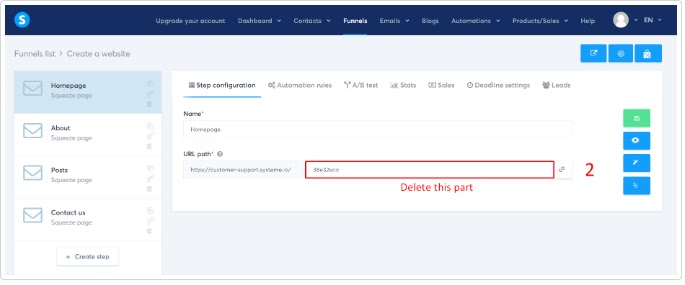
Open your funnel, select the page you
want to define as the homepage, and delete the URL path – number 2 in the
photo.
Step3: Add The “Menu”
Element to Your Site’s Homepage
After defining your homepage in your
funnel, add the “Menu” element to your site’s homepage.
Remember to add the same number of menus to match the number of funnel
steps/web pages.
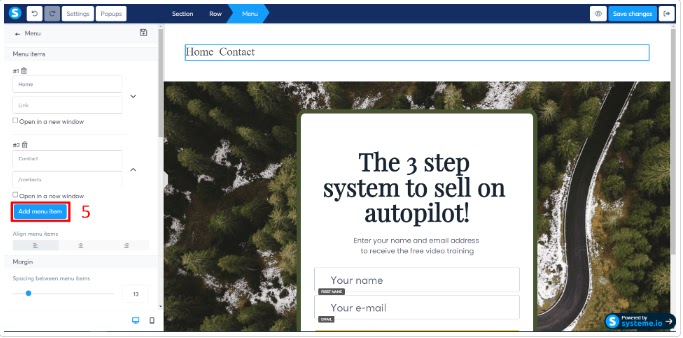
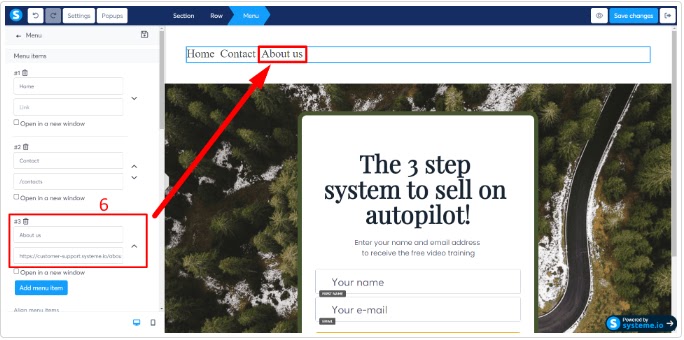
Open your editor’s homepage, drag
the “Menu” component, and position it on your website’s page.
Alternative Reading: How To Build a Website on GoDaddy
Alternative Reading: How To Build an eCommerce Website From Scratch
Alternative Reading: Best Website Builder For Teachers
Disclaimer: Some of the links in the
post are affiliate links and I’ll receive commissions if used. Thanks
- Get link
- X
- Other Apps







Comments
Post a Comment